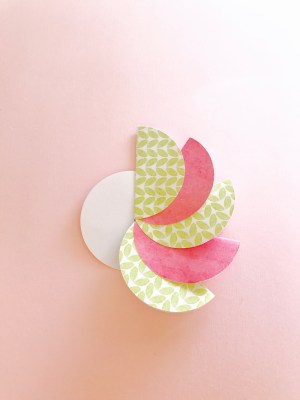
Aren’t these rosettes adorable? They would be lovely for a baby or wedding shower garland, an embellishment for a gift or just to hang on your fridge!
So easy yet so cute!
Supplies:
- paper
- glue
- a circle hole punch isn’t required but it sure makes this project easier and faster!
Step 1
- Cut/punch out the paper circles.
- I used approximately 10-12 2″ circles for these rosettes. If you use a 1″ hole punch you’ll need 17-20 circles.
Step 2
- Fold the circles in half.
- Save one unfolded circle aside to use as your rosette base; mark the center.
Step 3
- Glue the first circle to the base, lining it up with the center.
- Tip: use just a dab of glue on the first circle–the final circle needs to fit underneath.
Step 4
- Continue gluing the circles inside the fold of the previous circle, making sure they line up with the center mark.
- The final circle is tricky because it needs to fit underneath the first circle. My advise is to not use a ton of glue, this should allow you to move the pieces around easily.
Step 5
- Get creative with the center of the rosette. Use contrasting paper, glitter, fabric, pompoms, etc.
- Add twine or ribbon for hanging, or thread them together to make a garland.


