Thrift store shopping: it’s all about the thrill of the hunt, finding a diamond in the rough, searching for the Holy Grail.
Ok, so maybe I’m exaggerating a bit, but whatever you call it, thrift store shopping is one of the most satisfying pursuits around. First is that giddy rush you get when you find the perfect piece for your next craft project—a sturdy frame just waiting to be repainted, an antique candlestick you can gild, a long velvet dress that you’ll soon turn into an elegant table runner. Next is the joy you get when you turn over the price tag. Chances are, your thrift store find will be under $10. You head home loaded down with your treasures and then the crafting fun really begins.
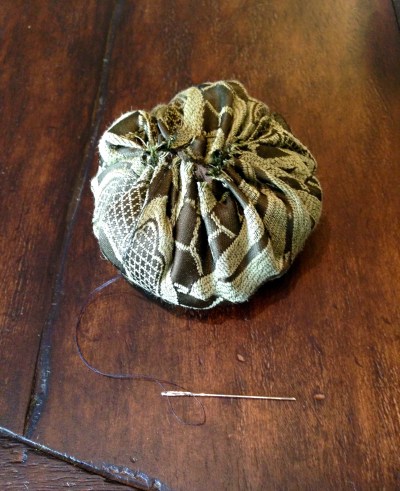
I’ve been wanting to make velvet pumpkins but didn’t want to spend $35 for a yard of velvet….so off to my local thrift store I went. I had no luck finding velvet but I did find a skirt made of a beautiful, deep green brocade. Price: $5.00. I’ll be able to make at least 2 or 3 pumpkins out of the skirt.
Raid your local thrift store or the remnant pile at a fabric store—-you’re bound to find a few pieces of fabric that will make beautiful fabric pumpkins.
Here’s all you need to create your pumpkins:
• 1/4 – 1/2 yard of fabric (soft fabric works best, nothing too thick or stiff)
• plates to use as templates
• rice or dried beans to give the pumpkin some weight
• fiber fill
• needle and thread
• twigs for the stem
Step 1
Use a plate to trace a circle onto your fabric. You can make a bunch all the same size and line them up on your mantle or make different sizes….they’ll look great piled in a basket or to use as gifts.
Step 2
Cut out your circles….precision is not an issue with this project.
Step 3
Knot the end of your needle and thread; sew around the edge of the circle about 1/4″ from the edge.
Step 4
Add some rice or dried beans, 1/4 – 1/2 cup, to give the pumpkin some weight.
Step 5
Stuff your pumpkins with fiber fill until you have nice plump pumpkins. You might need to move the filling around to even it out.
Step 6
Now it’s time to pull the pumpkin closed and sew the top together. You can either insert the stem before you pull the pumpkin closed or glue it on after you close up the opening.
That’s it….your thirft store pumpkin is done!
But don’t stop with just one. Scour your thrift store for fabric in different colors, patterns and textures….and keep creating!


